The Gentleman's Guide to Cast Iron Campfire Cooking
Most guides tell you what to cook over a campfire. This one teaches you how to master the tool that makes it all possible — the cast iron skillet.
A gentleman knows the difference between camping and roughing it. The distinction, more often than not, comes down to one thing: the quality of what he cooks.
Most men arrive at a campsite with good intentions and a bag of marshmallows. The ones who truly understand the outdoors arrive with something else entirely — a well-seasoned cast iron skillet, black as midnight, older than the tent they’re sleeping in, and capable of producing a meal that would embarrass most kitchen stovetops.
This is not a recipe guide. Those are easy enough to find. This is something rarer: a proper guide to the tool itself.
Why Cast Iron Is the Only Skillet Worth Packing
There is a reason cast iron has been the cooking vessel of choice for serious outdoor cooks for over a century. It is not nostalgia. It is physics.
Cast iron retains heat with an efficiency that aluminium and stainless steel simply cannot match. Once a cast iron skillet reaches temperature over a campfire, it holds that heat steadily — absorbing the inevitable fluctuations of a wood fire and delivering consistent, even cooking. The difference between a steak cooked in cast iron and one cooked in a thin aluminium pan is the difference between a proper sear and a grey, steamed disappointment.
It also goes anywhere. No handles to melt, no non-stick coating to scratch, no special cleaning requirements beyond what nature itself provides. A properly seasoned cast iron skillet is, in the truest sense, indestructible. Men have passed them down like heirlooms — and should.
The Foundation: Seasoning
Here is where most guides fail you. They tell you to season your pan, hand you a brief paragraph, and move on. But seasoning is not a step — it is a practice, and understanding it changes everything.
Seasoning is the layer of polymerised oil that bonds to the iron’s surface, creating a natural non-stick coating that improves with every use. The process is simple: apply a thin, even coat of oil with a high smoke point — flaxseed, refined coconut, or plain Crisco — wipe away any excess until the pan looks nearly dry, and bake it upside down in an oven at 230°C (450°F) for an hour.
One round of seasoning gives you a foundation. Six rounds, done over a few weekends, gives you a pan that slides eggs with no effort and releases fish without tearing. A decade of proper use gives you an heirloom.
The campfire rule: Never take an unseasoned or lightly-seasoned pan into the field. The open fire will strip whatever’s there and leave you with rust. Build the seasoning at home, systematically, before you ever need it outdoors.
Reading the Fire: The Skill Nobody Teaches
This is the single greatest gap in outdoor cooking knowledge, and it matters more than any recipe.
A campfire is not an oven. It does not have a dial. What it has is stages, and each stage offers something different to the cook who knows how to look.
Roaring flame: Beautiful to watch. Useless for cooking. The uneven, carbon-heavy heat will scorch the outside of anything while leaving the inside raw. If your fire looks like a photograph, it is not ready.
Dying flame with active coals: Getting closer. You can start searing here — the heat is intense but beginning to even out. Good for getting a crust on a steak before moving it to a cooler position.
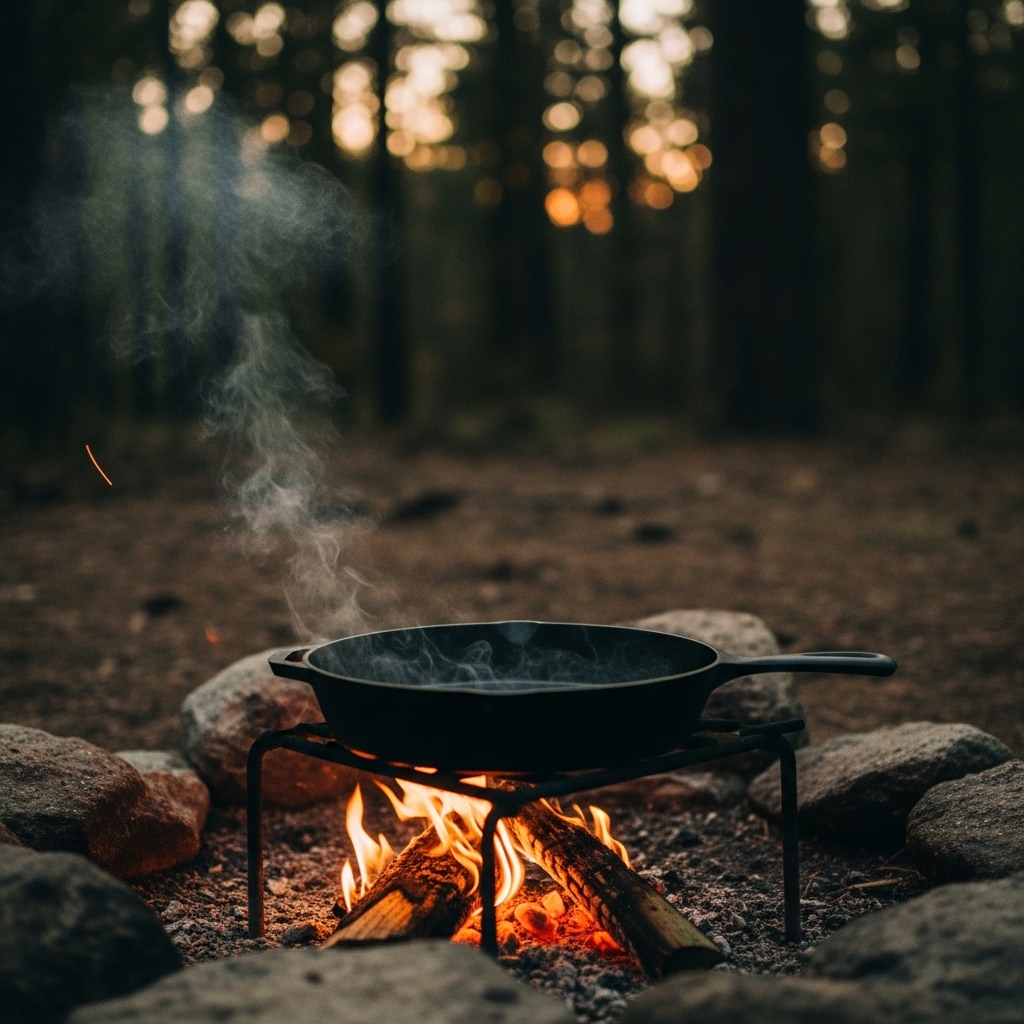
Deep red-and-grey coal bed: This is what you came for. A coal bed an hour into a good hardwood fire — oak, hickory, cherry — burns hot, even, and steady. This is the professional campfire kitchen. Your cast iron, set directly on the coals or an inch above them on a grate, will hold a consistent 200–230°C. You can cook anything.
White ash over coals: The long game. Slower heat, excellent for braises, beans, and anything that benefits from two hours of patience. A gentleman who started his fire at dusk and set his Dutch oven at this stage will eat exceptionally well by the time the stars are properly out.
The practical discipline: build your cooking fire before your social fire. Let one side of the fire ring work into coals while you set up camp. By the time you are ready to cook, the fire will be ready for you.
The Three Techniques That Define Cast Iron Mastery
Direct Searing
Place the skillet directly on a good coal bed. Allow it to preheat for four to five minutes — longer than feels necessary, shorter than feels safe. Test with a drop of water; it should bead and skitter across the surface immediately. This is the Leidenfrost effect, and it tells you the pan is at the right temperature.
Pat your protein dry. Season it. Lay it in without oil — at this temperature, the pan itself provides the release. Do not move it for the first two minutes. The crust will tell you when it is ready to turn; if it pulls away cleanly, it is. If it sticks, it needs another minute.
The Two-Zone Method
Position your skillet on a grate over the coals, but offset it so one half sits over direct heat and the other extends beyond the edge. This gives you two cooking zones on a single pan — a hot side for searing and a cooler side for finishing. The same principle that makes a two-zone charcoal grill so effective works beautifully with a coal bed.
This technique is particularly well-suited to thick-cut pork chops, chicken thighs, and any piece of fish with skin worth rendering.
Coal Roasting
The most overlooked technique. Nestle your cast iron skillet directly into the coal bed — not above it, but in it, surrounded on three sides. Then shovel live coals onto the lid. What you have created, in the wilderness, with no equipment beyond a skillet and a fire, is a field oven.
At this stage, bread rises. Frittatas set. A cast iron full of sliced potatoes, butter, garlic, and thyme becomes something worth remembering.
Cleaning in the Field: The Right Way
The myths about cast iron cleaning are numerous and mostly wrong. You do not need to avoid soap categorically — a small amount of modern dish soap will not strip a well-established seasoning. What you must avoid is prolonged soaking, extreme temperature changes (do not plunge a hot pan into cold water), and anything abrasive enough to scratch the seasoned surface.
Field method: Allow the pan to cool until it is comfortable to handle. Add a small amount of water and bring it back to warmth over the dying fire — the steam loosens anything stuck. Wipe clean with a cloth or paper towel. Dry it completely over heat, then apply a thin coat of oil and wipe away the excess. Pack it.
A cast iron skillet that is dried and lightly oiled before storage will not rust. One that is stored wet, even slightly, will begin to rust within days in humid conditions. This is the only real rule.
The One Investment That Pays for Itself
A quality cast iron skillet — a Lodge 10-inch is the working standard, a Butter Pat or a Stargazer for those who want something extraordinary — will outlast every other piece of kit you carry into the outdoors. It is heavier than alternatives, yes. The weight is the point. The weight is the mass that holds the heat that cooks the meal properly.
A gentleman who carries one into the wilderness and learns to use it well will never again be satisfied with the food that comes out of lesser vessels. That is not a warning. It is an invitation.
Build the fire early. Let the coals develop. Set the skillet in position. And cook the way men cooked before there were shortcuts.
The food will be better for it. So will the evening.